In today’s world of AI creativity, turning a static image into a vivid video is not just possible—it’s surprisingly easy using tools like SeaArt.ai and ComfyUI Workflow. This guide walks you through how to build your own image-to-video generation app, using text prompts, a single image, and the powerful Hunyuan model.
🧠 What You'll Learn
- How to get started on SeaArt.ai
- How to build a workflow using ComfyUI
- How to use the Hunyuan model for text-based scene generation
- How to publish and use your own AI app
🔰 Step 1: Sign Up and Get Inspired
- Go to SeaArt.ai
- Sign up or log in to your account
- Take a look around for inspiration—check the gallery, explore apps built by others, or think of your own idea
- Skim the Beginner's Guide to understand the SeaArt tools and interface
🎯 Step 2: Open ComfyUI Workflow Platform
- Click on “ComfyUI Workflow”

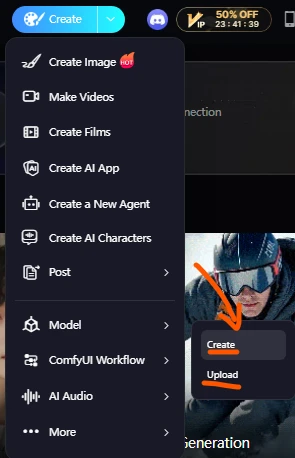
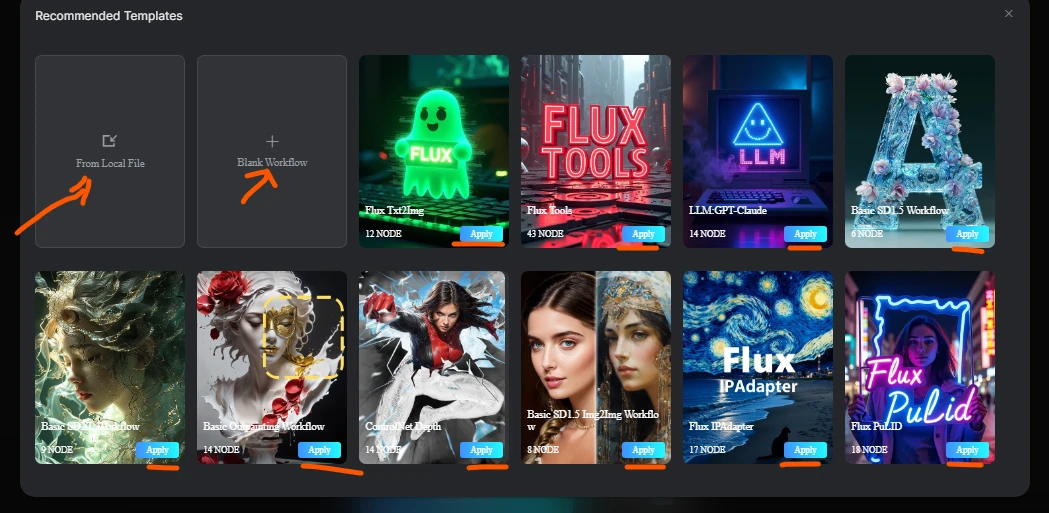
- Choose “Blank Workflow” to start from scratch
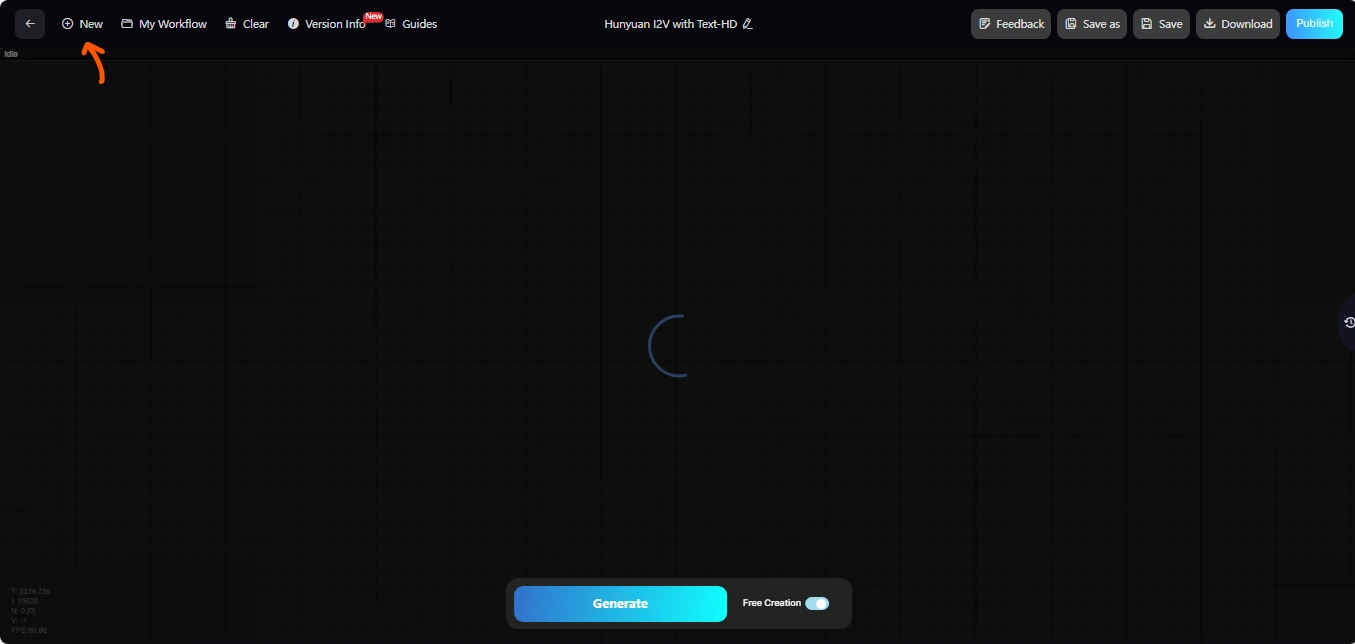
- You’re now in the blank workspace where you'll build your AI video generation flow
🛠️ Step 3: Build Your Image-to-Video Workflow (Hunyuan Method)
Double-click anywhere to add nodes and follow this structure:
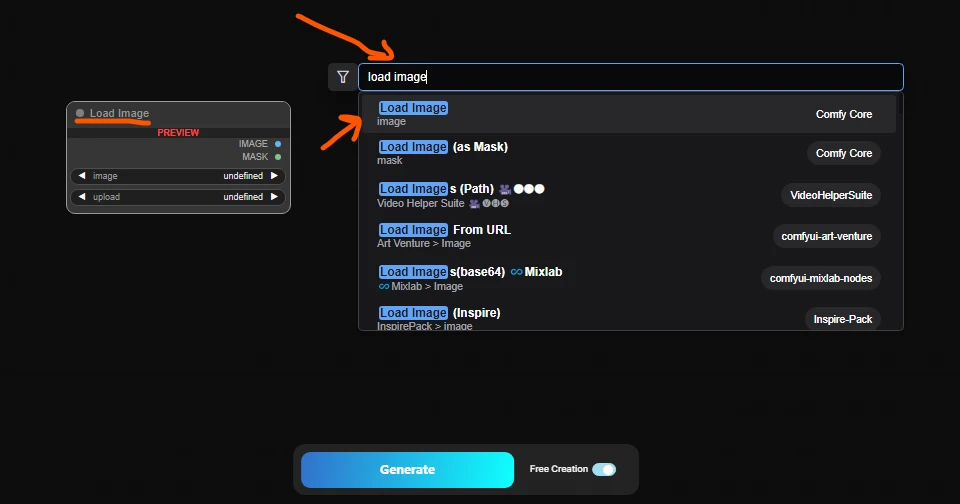
🧩 Node Setup (in order)
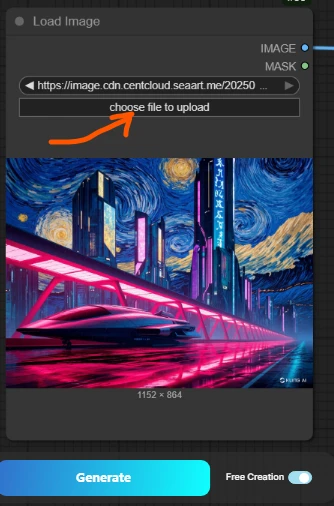
- Load Image Node – Import your image
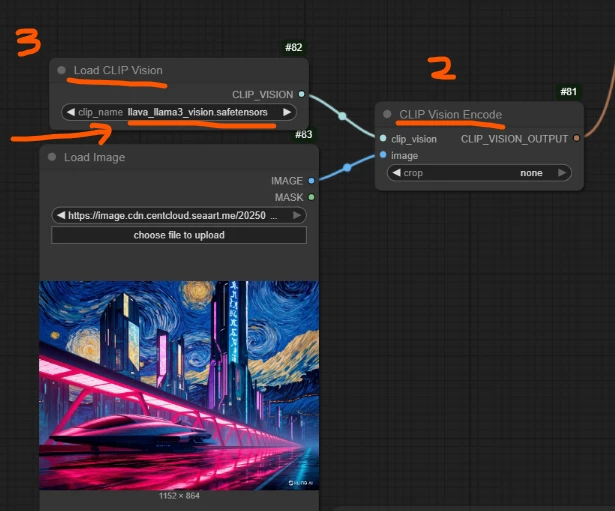
- Clip Version Encoded
- Load Clip Version (for Hunyuan compatibility)
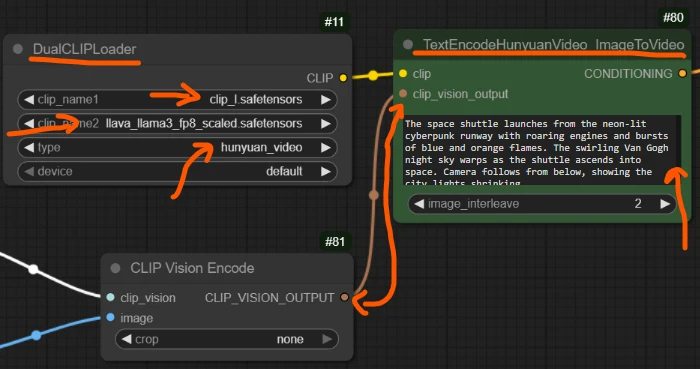
- TextEncodeHunyuanVideo_ImageToVideo Node – Add your scene prompt here
- DualCLIPLoader Node – Load controller models (Clip_I, ILava_Lama, Hunyuan)
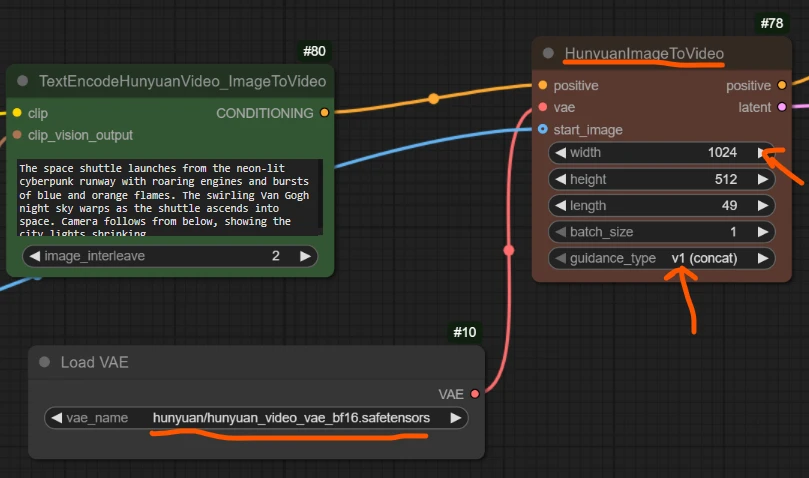
- HunyuanImageToVideo Node – Main video generator
- Load VAE Node – Supports visual quality
- FluxGuidance Node – Connects to HunyuanImageToVideo Node
- BasicGuider Node – Connects to FluxGuidance Node
- Load Diffusion Model Node – Choose “Hunyuan Video I2V safetensor”
- ModelSamplingSD3 Node – Connects to BasicGuider Node
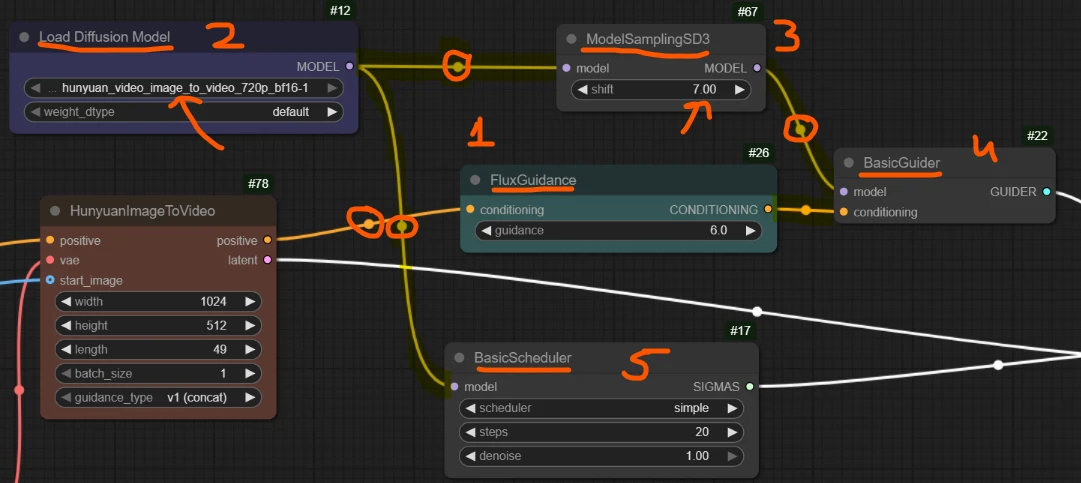
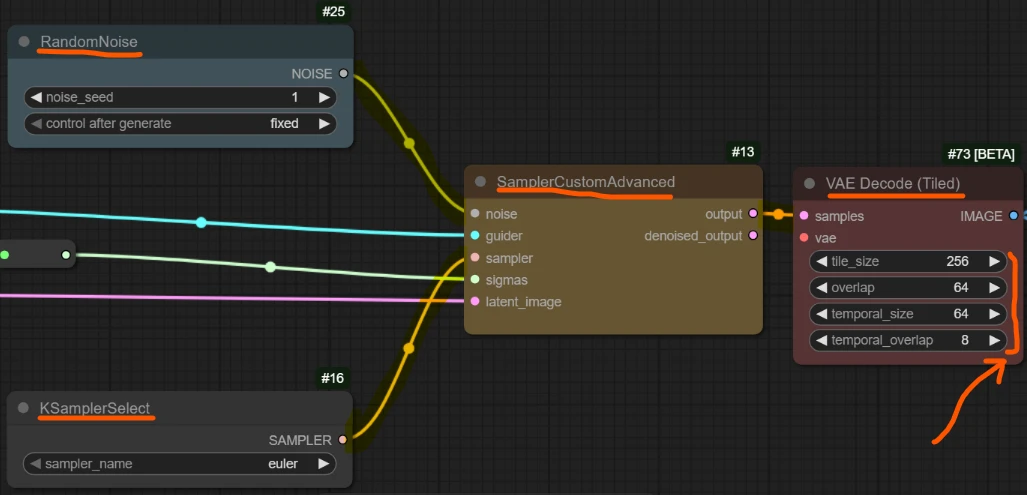
- SamplerCustomAdvanced Node – Controls the whole generation process Add: BasicScheduler, RandomNoise, KSamplerSelect
- VAE Decode (Tiled) Node – Converts it into viewable frames
- Video Combine 🎥🅥🅗🅢 Node – Final video output node

🔃 Step 4: Generate & Watch Output
- After all nodes are linked and parameters are set, click “Generate” at the bottom
- SeaArt will show the real-time generation process
- If any nodes are missing or misconfigured, it will highlight the problem and offer solutions
- Once successful, your video appears in the left preview panel
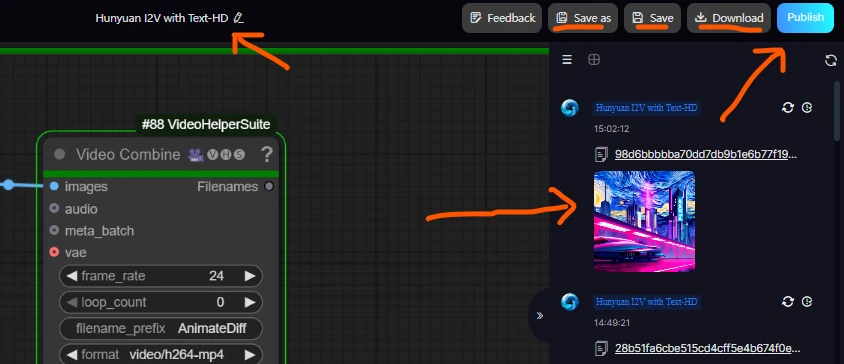
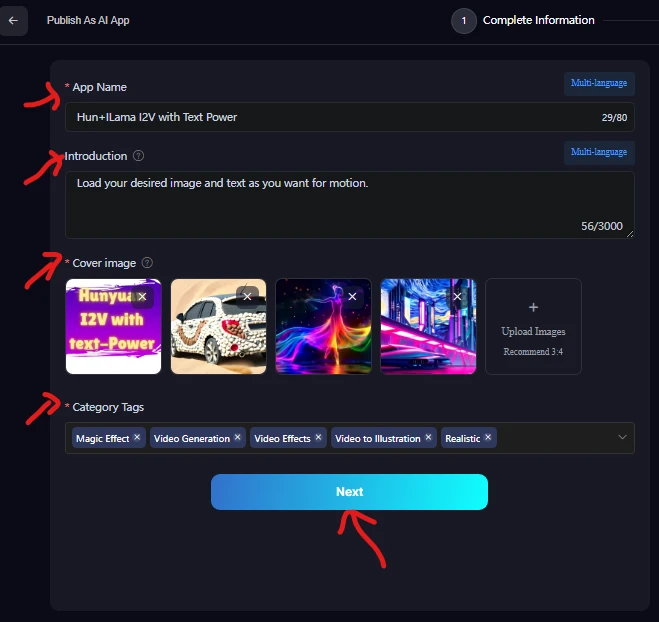
📢 Step 5: Save, Name, and Publish Your App
- Click the “Publish” button (top-left corner)
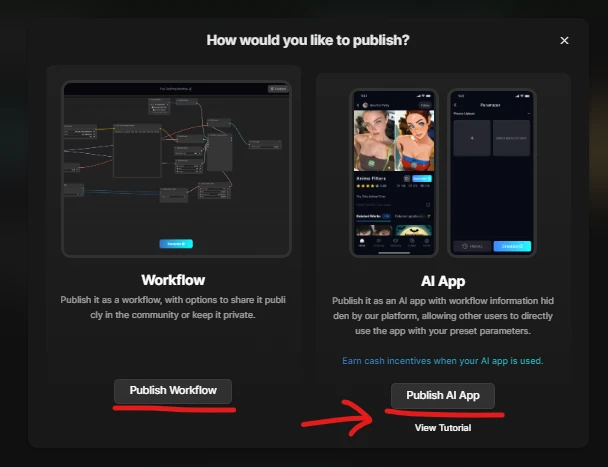
- Fill in: App Title Details (what it does, how it works) Cover Image and/or example video Add relevant Tags
- Click “Next”
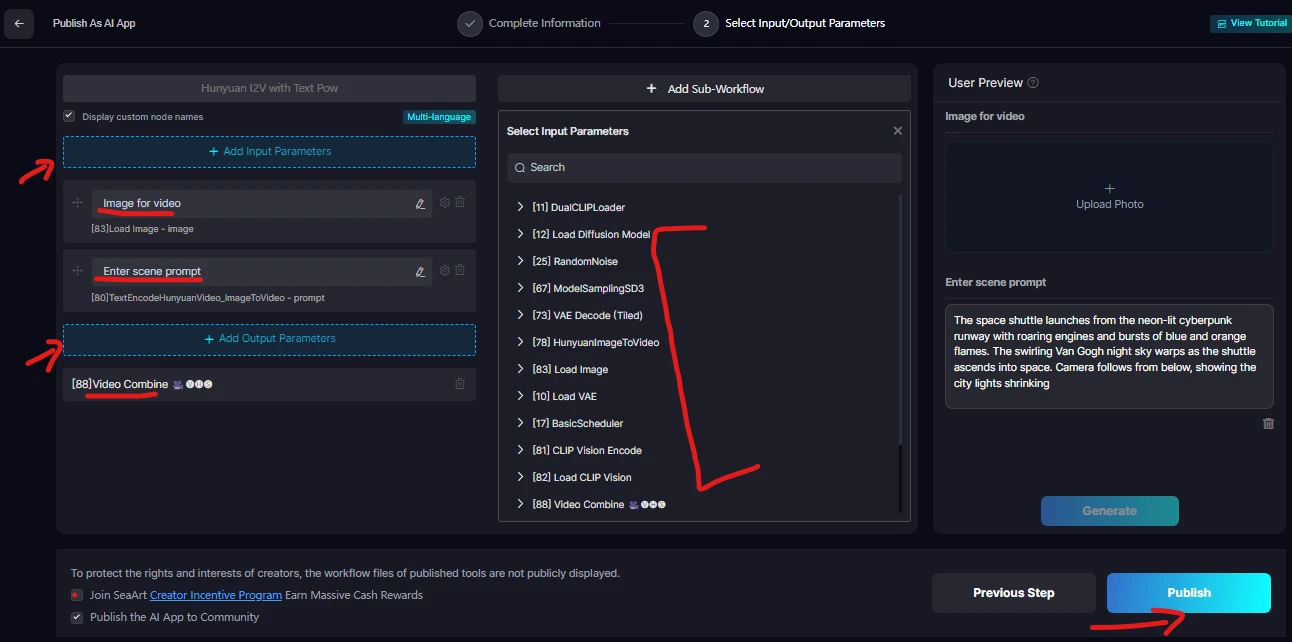
Add Nodes for Public Use:
- Add an Input Node (to control prompt or image input for users)
- Add an Output Node (to return generated results)
- Click “Publish App” to go live!
🎉 Congratulations! Your AI Image-to-Video App is now online!
▶️ Step 6: How to Use Your Published App
- Go to your Profile
- Click on Workflow → Comfy UI
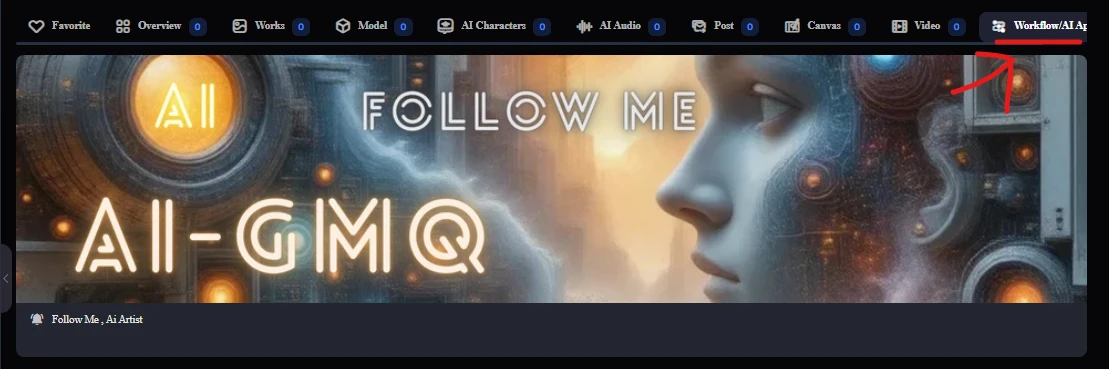
- Scroll to your app and click “Try”
- Inside the app: Upload an Image Enter your Prompt/Text Click “Generate” Wait for the process to complete Watch and enjoy your AI-generated video!
🔗 Try My Hunyuan-Based App
I've already built a working Image-to-Video generator using this exact method.
👉 Try my Workflow App here
Your support means a lot—feel free to use and share it!
💡 Final Tips
- Use vivid and descriptive prompts for better scene animation
- Save your workflow often with meaningful names
- Explore templates under ComfyUI for inspiration
- Publish your apps to showcase your creativity to the world
With SeaArt.ai and the power of ComfyUI + Hunyuan, anyone can turn images and ideas into full-fledged animated scenes. Now it's your turn—build, create, and amaze! 🚀🎨