Part 1: https://www.seaart.ai/articleDetail/cvibktte878c73d6k69g
Lora training
Congrats now is part two for our Lora training series I hope you will not get bored ;p. In this part, we will learn how to tag our dataset and to do lora training regarding our needs .
You may ask why I use other tools rather than sea art on sites training, The answer is very simple, i need more setting to tags my dataset .
REQUIREMENT
- HQ dataset
- enough credits (500-1500 Energy)
- computer or smartphone
- civit account and sea art account
- Black eyes on your face :p (If you don't have this, your training will be failed).
Lora training overview
The essence of training a LoRA model lies in generating images that bear a striking resemblance to the original training images. This is achieved by introducing additional weights to the Diffusion model, stored in a separate LoRA file.Imagine you have a massive library that holds every book ever written. This is like your huge pre-trained model. Now, you want to update this library to focus on a new genre without having to rewrite every book. Instead of changing all the pages, you just add a few new chapters that highlight this genre. That's essentially what LoRA training does. In LoRA training, you freeze the original model (block) and insert small, trainable low-rank matrices (the new chapters). These matrix adjust the model to a new task or style without overhauling the entire structure. This method not only saves time and resources but also preserves the valuable information already in the original model just like the library still retains all original books while being updated with fresh, relevant content.
Training Network
Lora (default)
This is the foundational technique that introduced the concept of low-rank matrix adaptation for fine-tuning large models. By decomposing weight updates into two smaller matrices, LoRA allows for efficient fine-tuning without updating all the model's parameters. This approach significantly reduces computational costs and memory usage, making it versatile for various tasks, including styles, concepts, and character adaptations.
LyCORIS
/locon (Lora beYond Conventional methods, Other Rank adaptation Implementations for Stable diffusion) yeah, I know, long name, but hear me out. This method was developed by KohakuBlueleaf and takes LoRA to the next level with a bunch of optimizations and experimental tweaks.
What makes LyCORIS special? It introduces techniques that lower rank requirements and shrink model sizes, making fine-tuning way more efficient. That means you can train faster and use fewer resources without sacrificing quality. It’s especially for style and concept training, giving you better control over things like artistic direction, textures, and overall model aesthetics.
DoRA
(Weight-Decomposed low-Rank Adaptation) Develop By Nvidia this is one of the newest techniques in the field of parameter-efficient fine-tuning It improves upon LoRA by decomposing the pretrained weights into two components: magnitude and direction then primarily updating the direction vectors during training.How DoRA Works:It decomposes each weight matrix in the neural network into:A magnitude vector (scalar values that determine "how much")A direction vector (normalized values that determine "which way")During fine-tuning, DoRA mainly updates the direction vectors while keeping magnitudes relatively stable.This approach maintains the model's learned knowledge while allowing for more efficient adaptation to new tasks or styles.
When to Use DoRA:For highest quality results when you have sufficient computational resources
When you want the best possible quality with minimal training sampleFor more complex concept learning (beyond just visual styles)
When to Use LoRA:For most common fine-tuning needs
When you need compatibility with the widest range of tools
For style transfer, character creation, or concept
When to Use LyCORIS:For specialized fine-tuning where standard LoRA underperforms
When you need more efficient parameter usage
Style and concept Focus Training
Preparation
First Go to this Sites make sure you have your account ready, why ? because it is easier to me to edit and maintain the tags
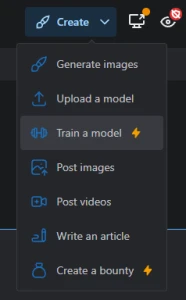
Steps 2. go to crate → train a model
Steps 3. Choosing A model type, you can select regardless to your need Give them name then hit next

Steps 4. What you need to do just import your image into the drop box zone
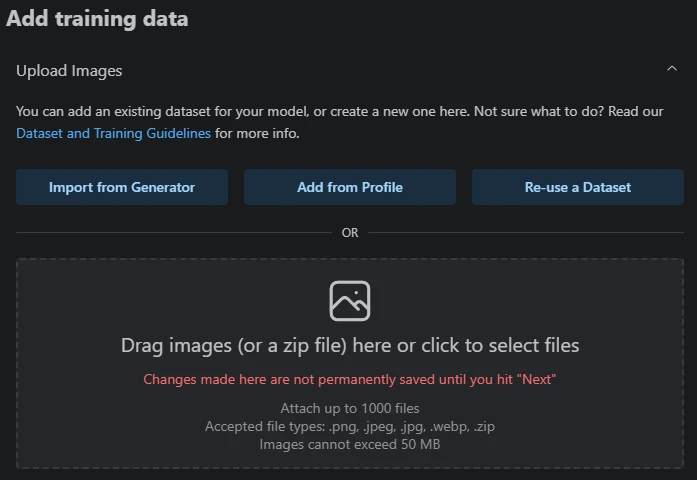
click the check box and hit next
Caption and Tagging
When tagging your dataset, only label the features you actually want the model to learn or distinguish. No need to overcomplicate things! For example, if every single image in your dataset already features a character with blue hair, you don’t have to add a "blue hair" tag unless you specifically want the model to recognize, reinforce, or modify that feature. In that case, go ahead and include it in your tags.The key here is to focus on attributes that change across your images or ones that you want the model to have direct control over. If something is always present and doesn't need to be altered, leaving it out will keep your dataset clean and your training more efficient. Over-tagging can sometimes lead to unwanted biases, so be intentional with what you include!
If you’re using a dataset for an anime checkpoint or style, choose tags. But if you’re using a flux checkpoint, it’s better to use captions instead.
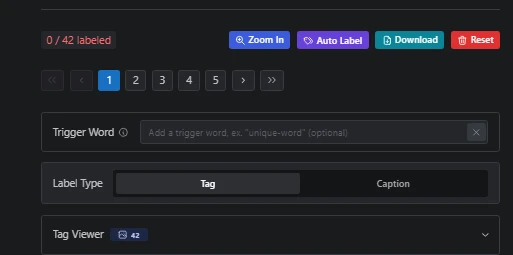
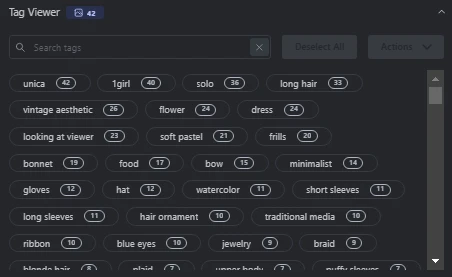
You'll notice that '0/42' means my images aren't tagged yet, so I need to tag them using auto-label for the base.
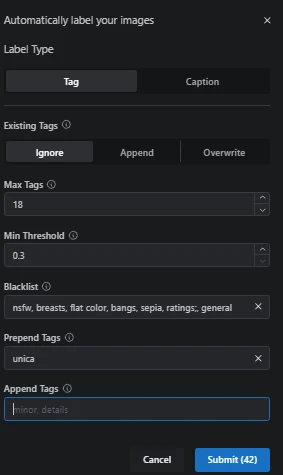
in this panel you can choose your max tags, min threshold, etc, for me I put min tags to 18 sometimes I use lower min tags to 15 or even 12 and min threshold set to 0.3 (the lower the threshold the more tags you will get) then hit submit
after that you will see your panel like this
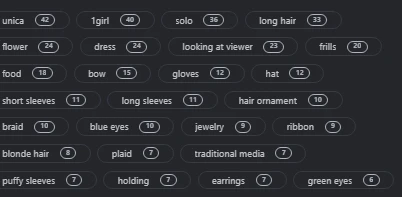
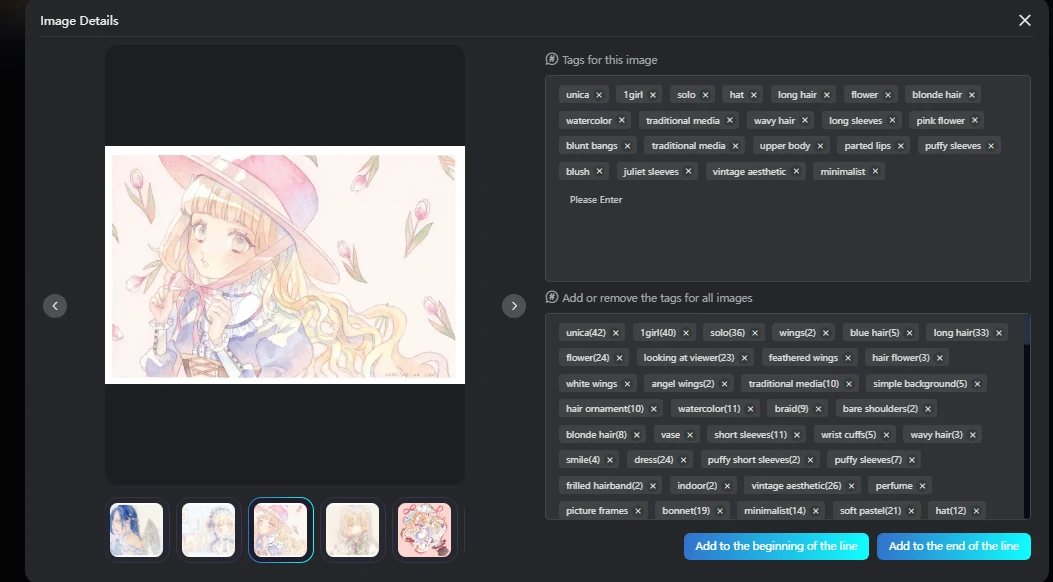
Next thing you want to add some Trigger word to your dataset so you can easily call some img you training In this case I add Unica as a Trigger base and other word like Vintage aesthetic so I can call some img style by this artist or by that word

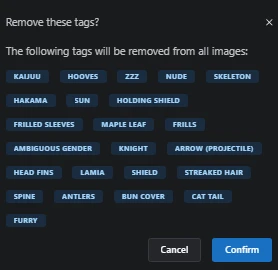
Note that you may want to delete any tags that aren't relevant. For instance, I removed some tags from my images because they didn't fit the dataset
Here the finish dataset looks like
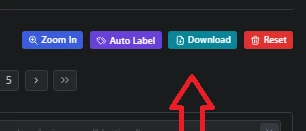
now all set then download your Finish dataset
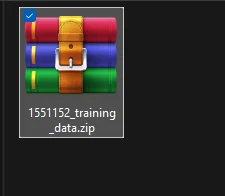
after you finish downloading your dataset you will get zip file you need to extract them
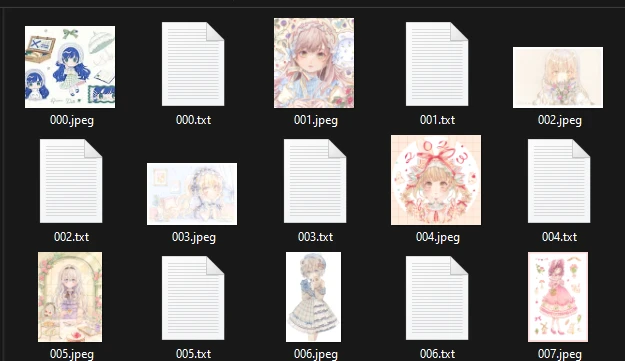
here what the dataset looks like
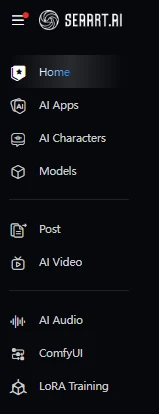
Next steps Is training since we will use sea art for training you can click Lora training on the side panel
train —>then create dataset

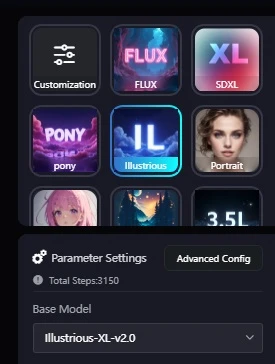
choose your favorite checkpoint in this case I will use Illustrious 2.0 as my checkpoint
now upload your folder that contain you're dataset from previous tutorial
you may notice that regular dataset so what is it?
Regularization Dataset
(Regular Dataset) regular dataset is a set of images used during training to prevent overfitting and help the model generalize better. When training a LoRA, especially for character or concept fine-tuning, your model can sometimes overlearn specific features from your dataset. This can lead to unwanted biases, like your LoRA forcing a certain look onto every output, even when it's not supposed to.Basically during training, the regularization images are mixed with your dataset. The idea is to give the model some "neutral" data to remind it of the base model’s original balance. You don’t always need it, but if you notice overfitting or extreme style forcing, adding a regular dataset can help stabilize your LoRA’s output. So, if your LoRA is getting too aggressive and messing with unrelated prompts, you might need a regularization dataset!
here what you're dataset looks like on this sites
Advanced LoRA Training Parameter
Adjustments As you advance in LoRA training, mastering key parameters becomes essential for improving efficiency and output quality. This section provides insights into selecting and fine-tuning these parameters for optimal results.
Repeat:
Controls how many times the AI cycles through images in the dataset per epoch. Increasing the repeat value for specific images or folders can help emphasize them during training. The ideal repeat value depends on the dataset size, complexity, and specific training goals. low Img count = more repeat, try adjusting this depending on your dataset (e.g 50 img repeat 4 this mean you img will be repeat 4 times per epoch during training)
Epochs:
Represents the number of times the entire dataset is passed through the model during training. More epochs allow the model to learn finer details, but excessive training can lead to overfitting. Too few epochs may cause underfitting, preventing the model from learning effectively. The optimal number varies based on dataset complexity and learning rate
Batch Size:
Determines how many images are processed simultaneously in one forward and backward pass. A larger batch size can speed up training by utilizing GPU resources more efficiently and improving stability. However, it also requires more memory.
How steps work,
Example Breakdown
Dataset size = 150 images
Repeat = 2 (each image appears twice per epoch)
Epochs = 20 (the dataset is processed 20 times)
Batch size = 1 (each batch contains 1 image)
Step 1: Images Processed Per EpochSince each image is repeated 2 times, the total number of images processed per epoch is: 150 (images)×2 (repeat)=300 images per epoch
Step 2: Total Images Processed Over 20 EpochsSince training runs for 20 epochs, the total number of images processed is:300 (images per epoch)×20 (epochs)=6000
Step 3: Training Steps CalculationBatch size = 1, meaning the model processes 1 image per stepSince 300 images are processed per epoch, and each image is handled one at a time due to batch size 1, the number of training steps per epoch is:300 (images per epoch)÷1 (batch size)=300 steps per epoch
Over 20 epochs, the total number of training steps is: 300 (steps per epoch)×20 (epochs)=6000 training steps in total
Learning Rate and Optimizer
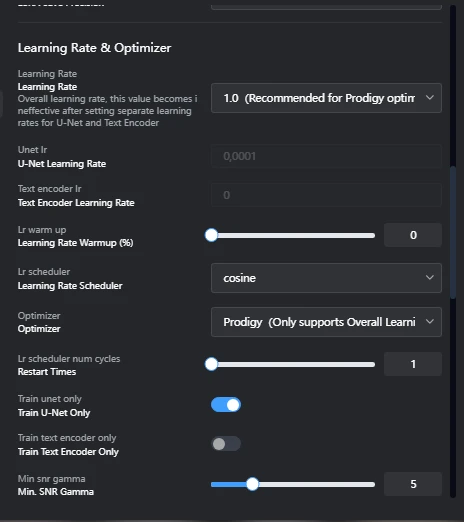
Learning Rate:
This parameter sets the pace of training like adjusting the oven temperature when baking. A higher learning rate speeds up learning, while a lower rate slows it down and might lead to underfitting. In this tutorial I chose a learning rate set to 1 since Prodigy is adaptive learning rate means that the learning rate adjusts based on the situation during training. Instead of staying the same throughout, it changes dynamically depending on how the model is learning.
Learning Rate Scheduler:
This tool dynamically adjusts the learning rate during training to help optimize performance. you may want set this to Cosine with no restart or set to constant according to your need Optimizer: Responsible for updating the model’s weights based on feedback from the loss function, i set this to prodigy, you may want to set to other optimizer if you want train character or concept
Network Rank:
Defines the complexity of the network by setting the number of neurons in the hidden layers. A higher network rank increases the model’s capacity to capture fine details but can result in larger LoRA file sizes and lower quality outputs if set too high.
Network Alpha: Ideally set at half or less of the Network Rank value.
Experiment Table
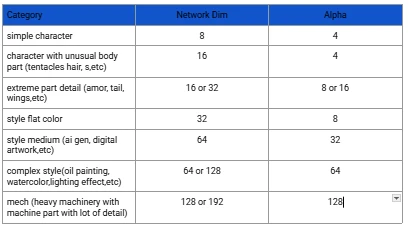
my starting point (the way I go!!!)
character with a lot of detail (15-45 IMG dataset),Dim 32 alpha 16 700+ –> 1500 steps
Styles (30-300++IMG Dataset) dim 64, alpha 32 1500 steps for simple style, 3000 steps for more complex style
concept basic / depending on dataset usually (30-50+IMG Dataset) dim 32 alpha 16 1250 -> 2000+ steps
Adamw8bit = cosine with restart personally 1 - 3 restart or constant with no restart, LR:4e-1,3e-1
Prodigy= 1.0 learning rate, cosine no restart, constant no restart noise 0.3,
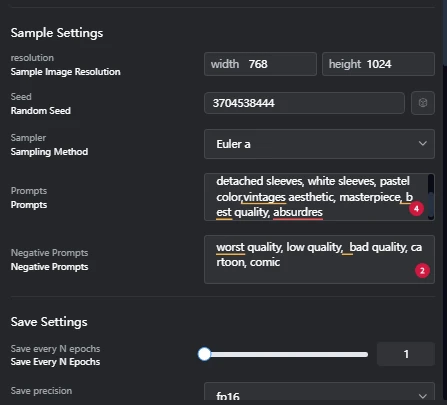
Tagging setting, if you enable shuffle caption basically youre caption will be shuffle during training this is basically good for style you may want to keep the trigger word on the first place so keep N token to 1 for max token ratio set according to your need, I set this to 150, other setting like noise keep default, snr gamma set to 5 for anime, 7 to 10 for realistic,
Prompt setting adjust to your need
All set now hit train and wait...........
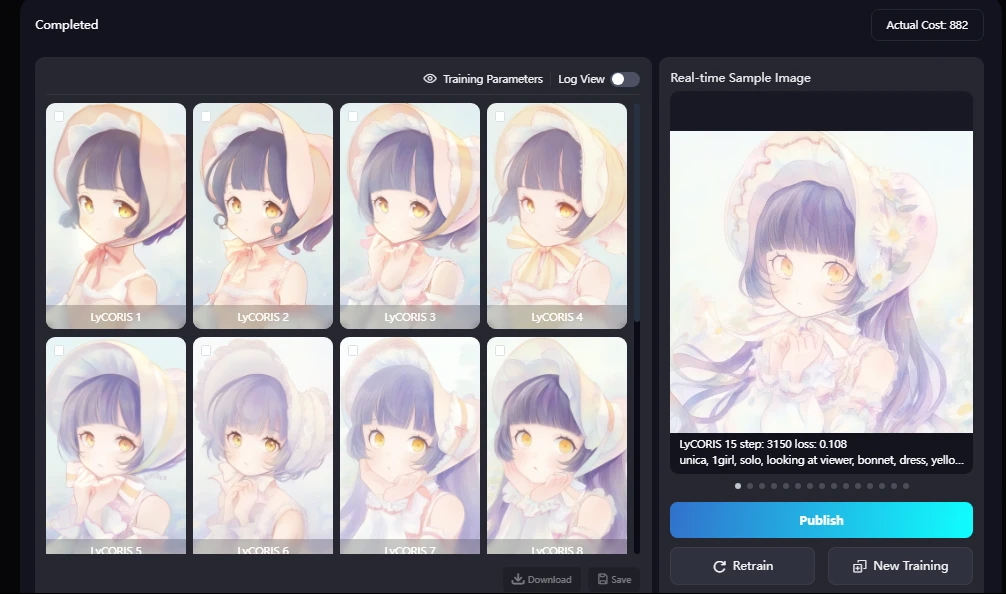
Note: Your best LoRA isn't always the last one you trained. Don't just assume the latest version is the best. You gotta test them one by one and compare the results. Sometimes an earlier LoRA might perform better for your specific use case.
Experiment, tweak, and find the sweet spot that gives you the best quality.
let’s talk about the loss curve in your training logs and what it actually means.
When you check your logs, you'll see a graph tracking loss values over time. This curve tells you how well (or badly) your LoRA is learning. Here’s the breakdown:
The loss value measures how well the AI is learning from the training data. It reflects the difference between the images generated by the AI and the target images in the dataset.
Monitoring the loss during training is crucial for evaluating the LoRA models progress. Ideally, the training loss curve should show a steady decline.
If the loss plateaus or starts increasing, it could indicate overfitting or the need to adjust the learning rate.
What to Watch For: Smooth, downward curve = Training is working as expected.
Erratic jumps = Might need to adjust learning rate or dataset quality.
Loss stuck at a high value = Could be overfitting or bad hyperparameters.
Here some stable loss value
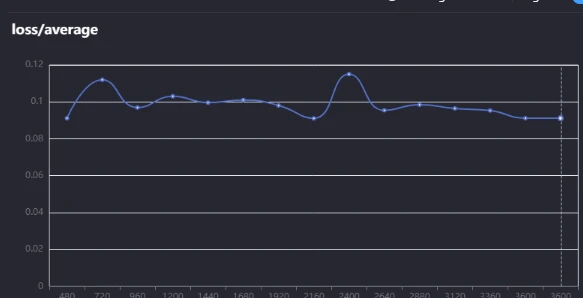


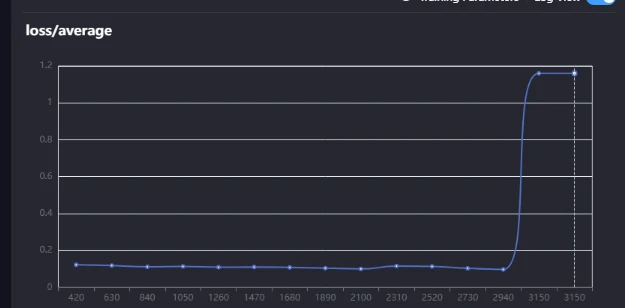
And here's what an overfitting curve looks like. At the start of training, everything looks smooth the loss is dropping, and the model is learning properly. But as training continues, near the end, the curve starts acting up. Instead of improving, the loss either stalls, fluctuates, or even starts increasing. That's your sign of overfitting the model is memorizing the training data too much instead of generalizing properly.
Tips (aka how to cheat 😉)
Alright, here’s a little shortcut if you’re not sure how to start tweaking your LoRA settings. If you’re struggling with setting the right parameters, you can check how others did it using these tools:
These tools let you view and edit the metadata of existing LoRA models, meaning you can see:The parameters they used (rank, alpha, learning rate, etc.)
What dataset settings worked for them
How they structured their training
Why This Is Useful? Instead of guessing, you can analyze what works and adjust your settings based on real, tested LoRA models. If you find a LoRA that performs well, study its metadata and tweak your training accordingly. Don't just copy blindly you need to understand what each parameter does so you can fine-tune it for your own dataset. Experiment, adjust, and optimize
Recommended reference
Concept lora:
a. PSof
b. KFTIGER
c. Hoyos
Character
a. Goofy
b. Madoka
c. Chrome
Style
a. Xuen
b. Chrono
c. Shiroo
and that's a wrap! Now you’ve got the knowledge to train, tweak, and optimize your own LoRA models like a pro. Remember, experimenting is key adjust parameters, test different settings, and find what works best for your dataset, If you found this guide helped you out, hit that like button or try out some of
my LoRA models! It really supports me in making better tutorials and even developing the newer LoRA model.
Feel free to drop your results in the comments, share your thoughts, or let me know what you'd love to see next.
MY Lora
Hdr https://www.seaart.ai/models/detail/csor35de878c738f4i3g
5cm Film Poster https://www.seaart.ai/models/detail/d80ccc40dc8e4d3a96d5ed151eaa22c8
Other Lighting https://www.seaart.ai/models/detail/cs89qq5e878c739tvdvg
Checkpoint
https://www.seaart.ai/models/detail/ctleqn5e878c73bophk0
Part 1 https://www.seaart.ai/articleDetail/cvibktte878c73d6k69g
—-------------------------------=I'M leaving—----------------------------